io.github.appwrite/mcp-for-api MCP Server
io.github.appwrite/mcp-for-api
Connect Claude and Cursor to Appwrite's backend APIs—databases, users, functions, storage, and teams—through browser OAuth.
What is the io.github.appwrite/mcp-for-api MCP server?
The Appwrite MCP server exposes Appwrite's full API surface—databases, users, functions, teams, storage, and more—as tools your MCP client can call. It supports both Appwrite Cloud (via hosted server at mcp.appwrite.io with browser OAuth) and self-hosted Appwrite instances (via local stdio with API keys). Works with Claude, Cursor, VS Code, and 15+ other AI clients.
This server bridges Appwrite backend services into your AI coding environment. Instead of manually calling REST APIs, you can ask Claude or Cursor to create databases, manage users, deploy functions, handle storage, and organize teams. Authentication is seamless—just approve scopes in your browser the first time you connect. Ideal for building full-stack applications, automating backend tasks, and prototyping Appwrite projects.
How to install io.github.appwrite/mcp-for-api
Copy-paste configuration for popular MCP clients.
Tools & capabilities
Tools this server exposes to the agent.
Database operations— Create, read, update, and delete databases and collectionsUser management— Manage users, authentication, and user accountsFunctions— Deploy and manage serverless functionsStorage— Handle file storage and retrievalTeams— Organize and manage teamsDocumentation search— Search Appwrite documentation via appwrite_search_docs tool
Use cases
- Build a full-stack app by creating databases and collections while coding
- Automate user onboarding and authentication flows
- Deploy and manage serverless functions without leaving your editor
- Organize team-based projects and manage permissions
- Prototype Appwrite backends interactively with AI assistance
io.github.appwrite/mcp-for-api MCP server FAQ
It's a Model Context Protocol server that exposes Appwrite's APIs (databases, users, functions, storage, teams) as tools for Claude, Cursor, and other AI clients. You can manage your entire Appwrite backend through natural language.
Yes. The hosted server at mcp.appwrite.io is free to use. You only need an Appwrite account (free tier available). Self-hosted Appwrite instances require your own infrastructure.
Edit ~/.cursor/mcp.json or .cursor/mcp.json and add: {"mcpServers": {"appwrite": {"url": "https://mcp.appwrite.io/"}}}. Cursor will prompt you to log in via browser.
Go to Settings → Connectors → Add custom connector and paste https://mcp.appwrite.io/ (Pro/Max plans). Or use Local MCP servers with npx mcp-remote (all plans).
For Appwrite Cloud: browser OAuth (no keys needed). For self-hosted: project API key. Authentication happens once; subsequent calls use the established session.
Yes. Run the server locally over stdio with your project API key. See docs/self-hosted.md for per-client setup instructions.
README (reference)
Source of truth, from the repository.
Appwrite MCP server

A Model Context Protocol server for Appwrite. It exposes Appwrite's API — databases, users, functions, teams, storage, and more — as tools your MCP client can call.
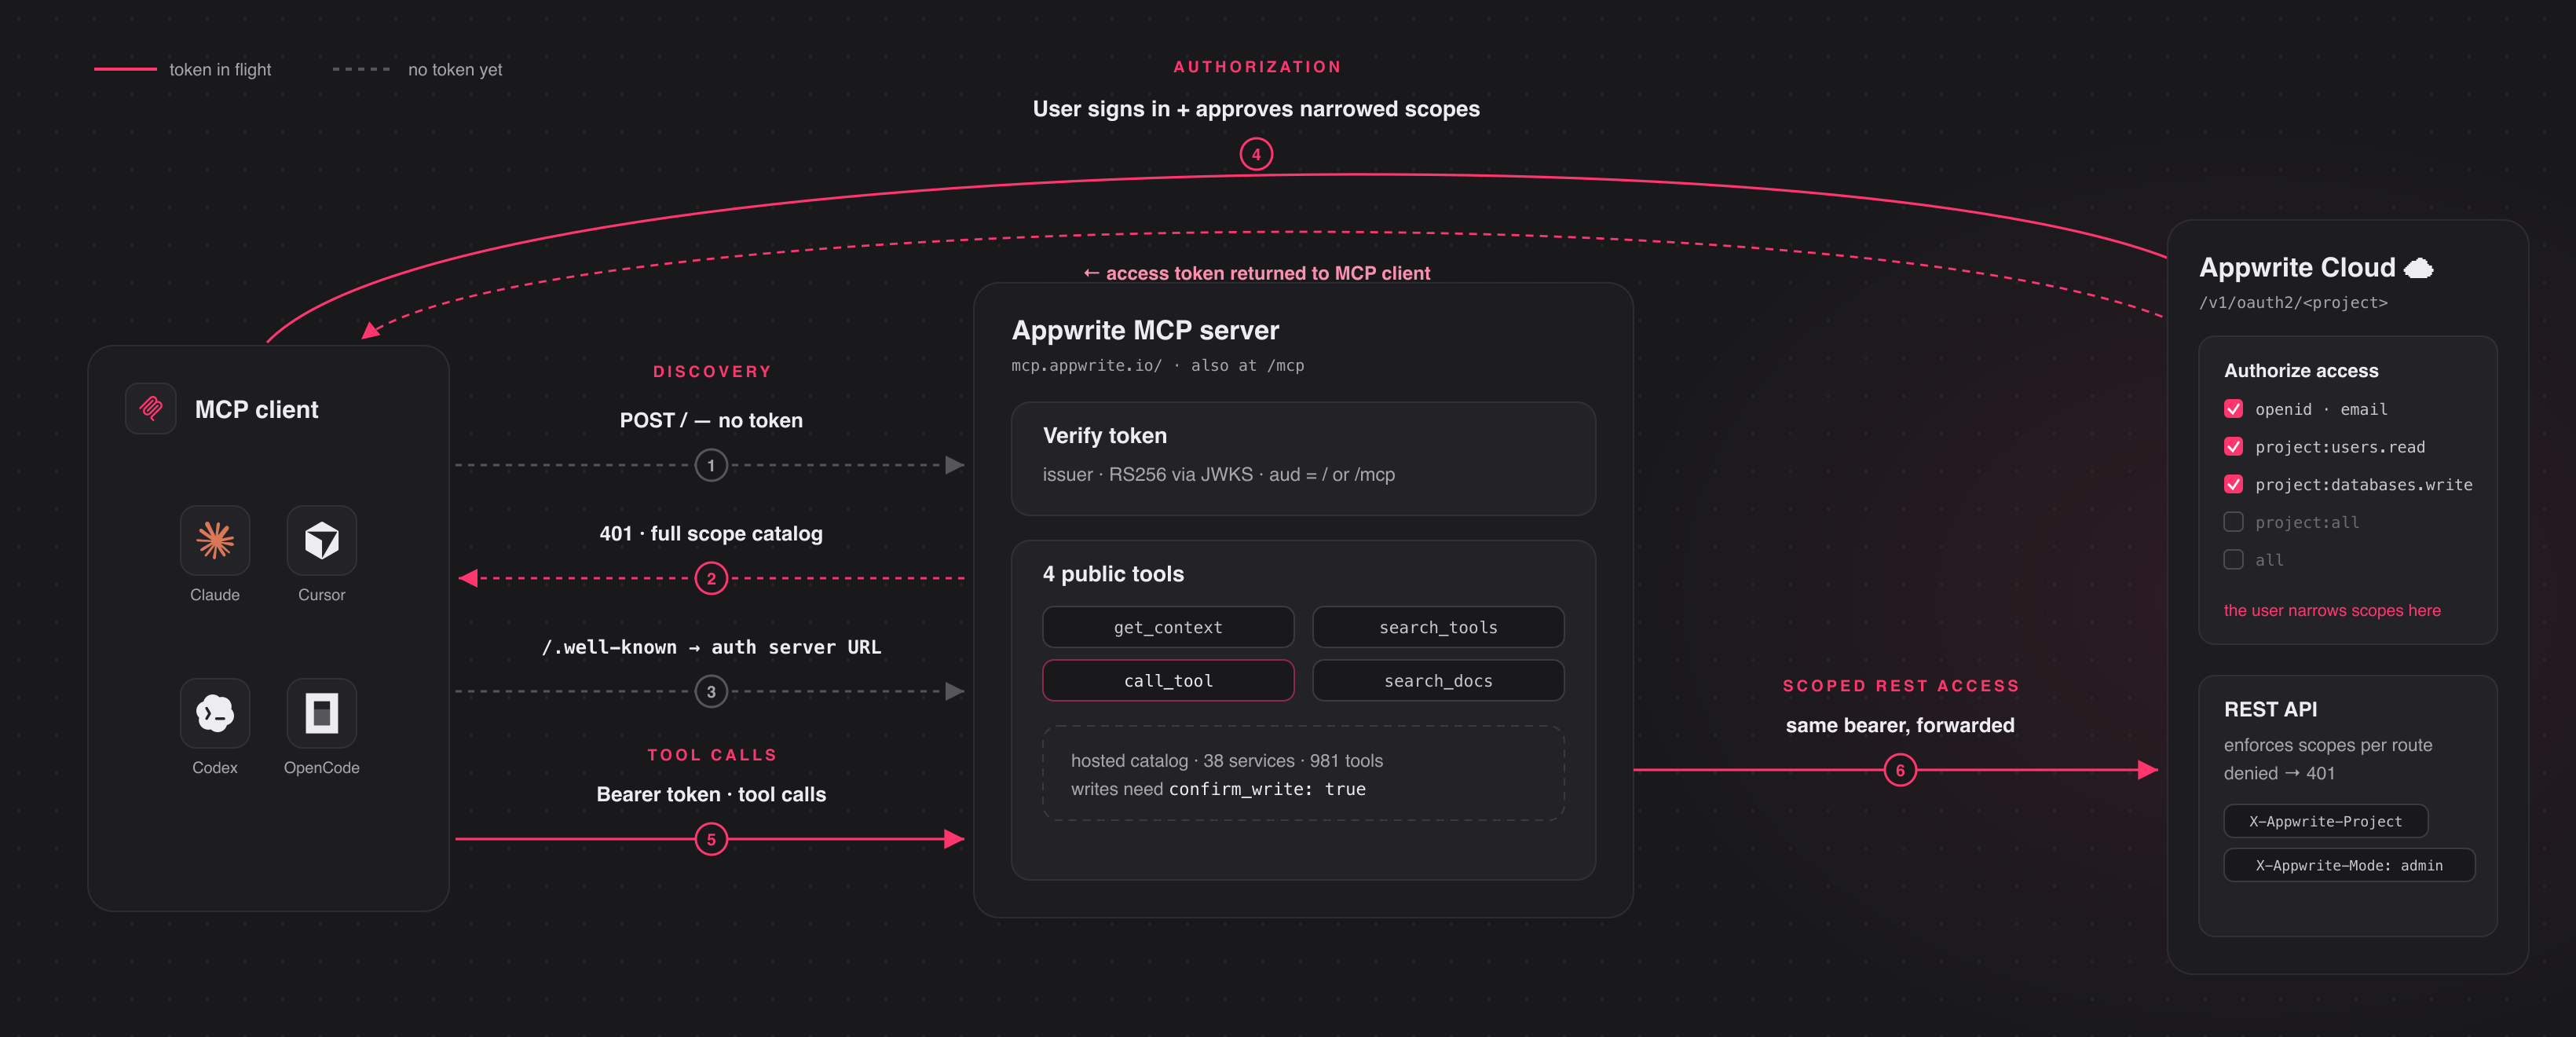
Connect to the hosted server at https://mcp.appwrite.io/ and authenticate
through your browser. The first time you connect, your client opens an Appwrite
consent screen; approve the scopes and you're connected. There are no keys to
copy. The conventional https://mcp.appwrite.io/mcp URL is also supported and
connects to the same server.
Connect your client
Pick your client below. Each adds the hosted Appwrite Cloud server.
<details open> <summary><b>Claude Code</b></summary>claude mcp add --transport http appwrite https://mcp.appwrite.io/
Then, inside a Claude Code session, run /mcp, select appwrite, and follow
the browser prompt to authenticate.
Go to Settings → Connectors → Add custom connector and paste
https://mcp.appwrite.io/. Available on Pro and Max plans; on Team and
Enterprise plans only an organization Owner can add custom connectors.
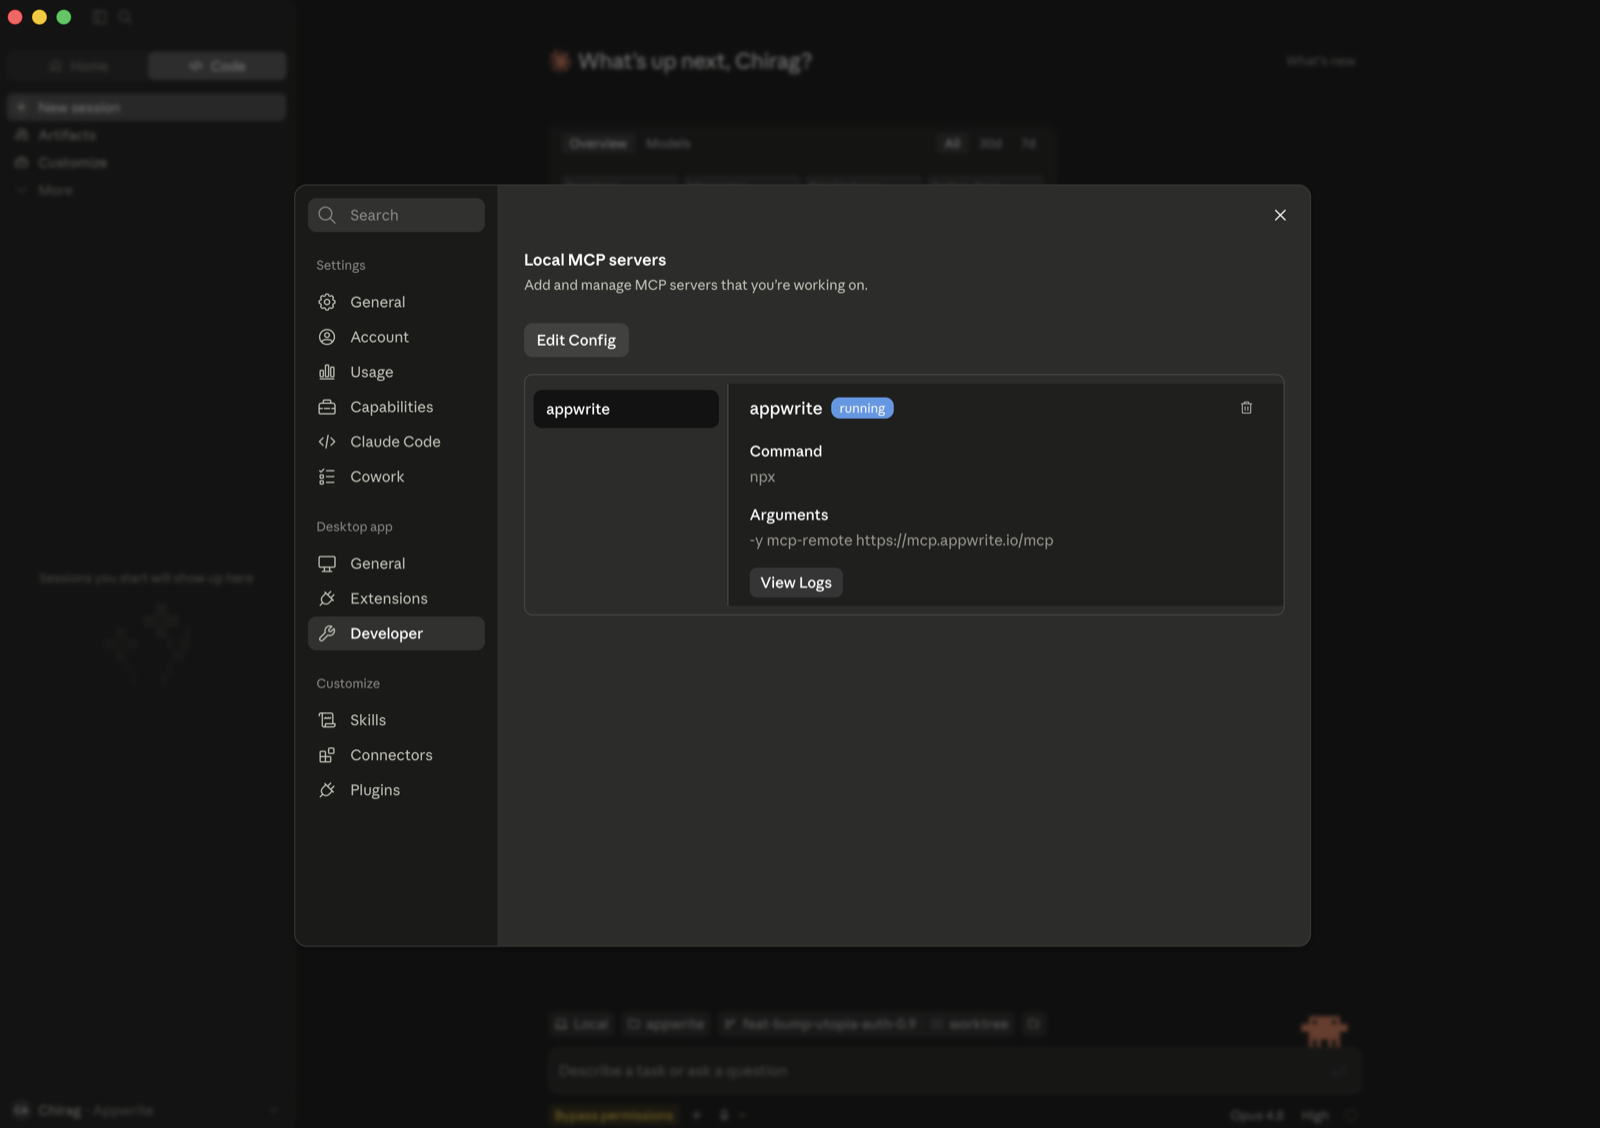
If you don't see that option (free plan, or a Team/Enterprise member), bridge the remote server through stdio instead (requires Node.js). Go to Settings → Developer → Local MCP servers, click Edit Config, and add:
{
  "mcpServers": {
    "appwrite": {
      "command": "npx",
      "args": ["-y", "mcp-remote", "https://mcp.appwrite.io/"]
    }
  }
}
Restart Claude Desktop; the server appears under Local MCP servers and a browser window opens to authenticate.
Edit ~/.cursor/mcp.json (global) or .cursor/mcp.json (project).
{
  "mcpServers": {
    "appwrite": {
      "url": "https://mcp.appwrite.io/"
    }
  }
}
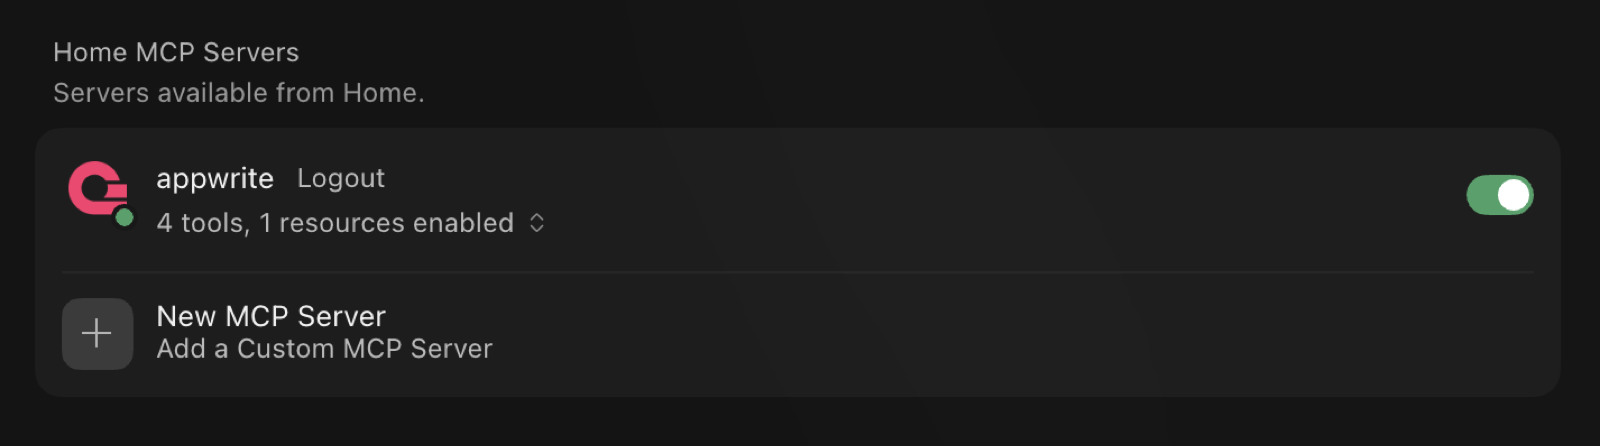
Cursor prompts you to log in through the browser; the server then shows up under Settings → MCP with its tools enabled.
Edit .vscode/mcp.json (workspace) or your user configuration via the Command
Palette → MCP: Open User Configuration.
{
  "servers": {
    "appwrite": {
      "type": "http",
      "url": "https://mcp.appwrite.io/"
    }
  }
}
Edit ~/.codex/config.toml.
[mcp_servers.appwrite]
url = "https://mcp.appwrite.io/"
Then authenticate from the terminal:
codex mcp login appwrite
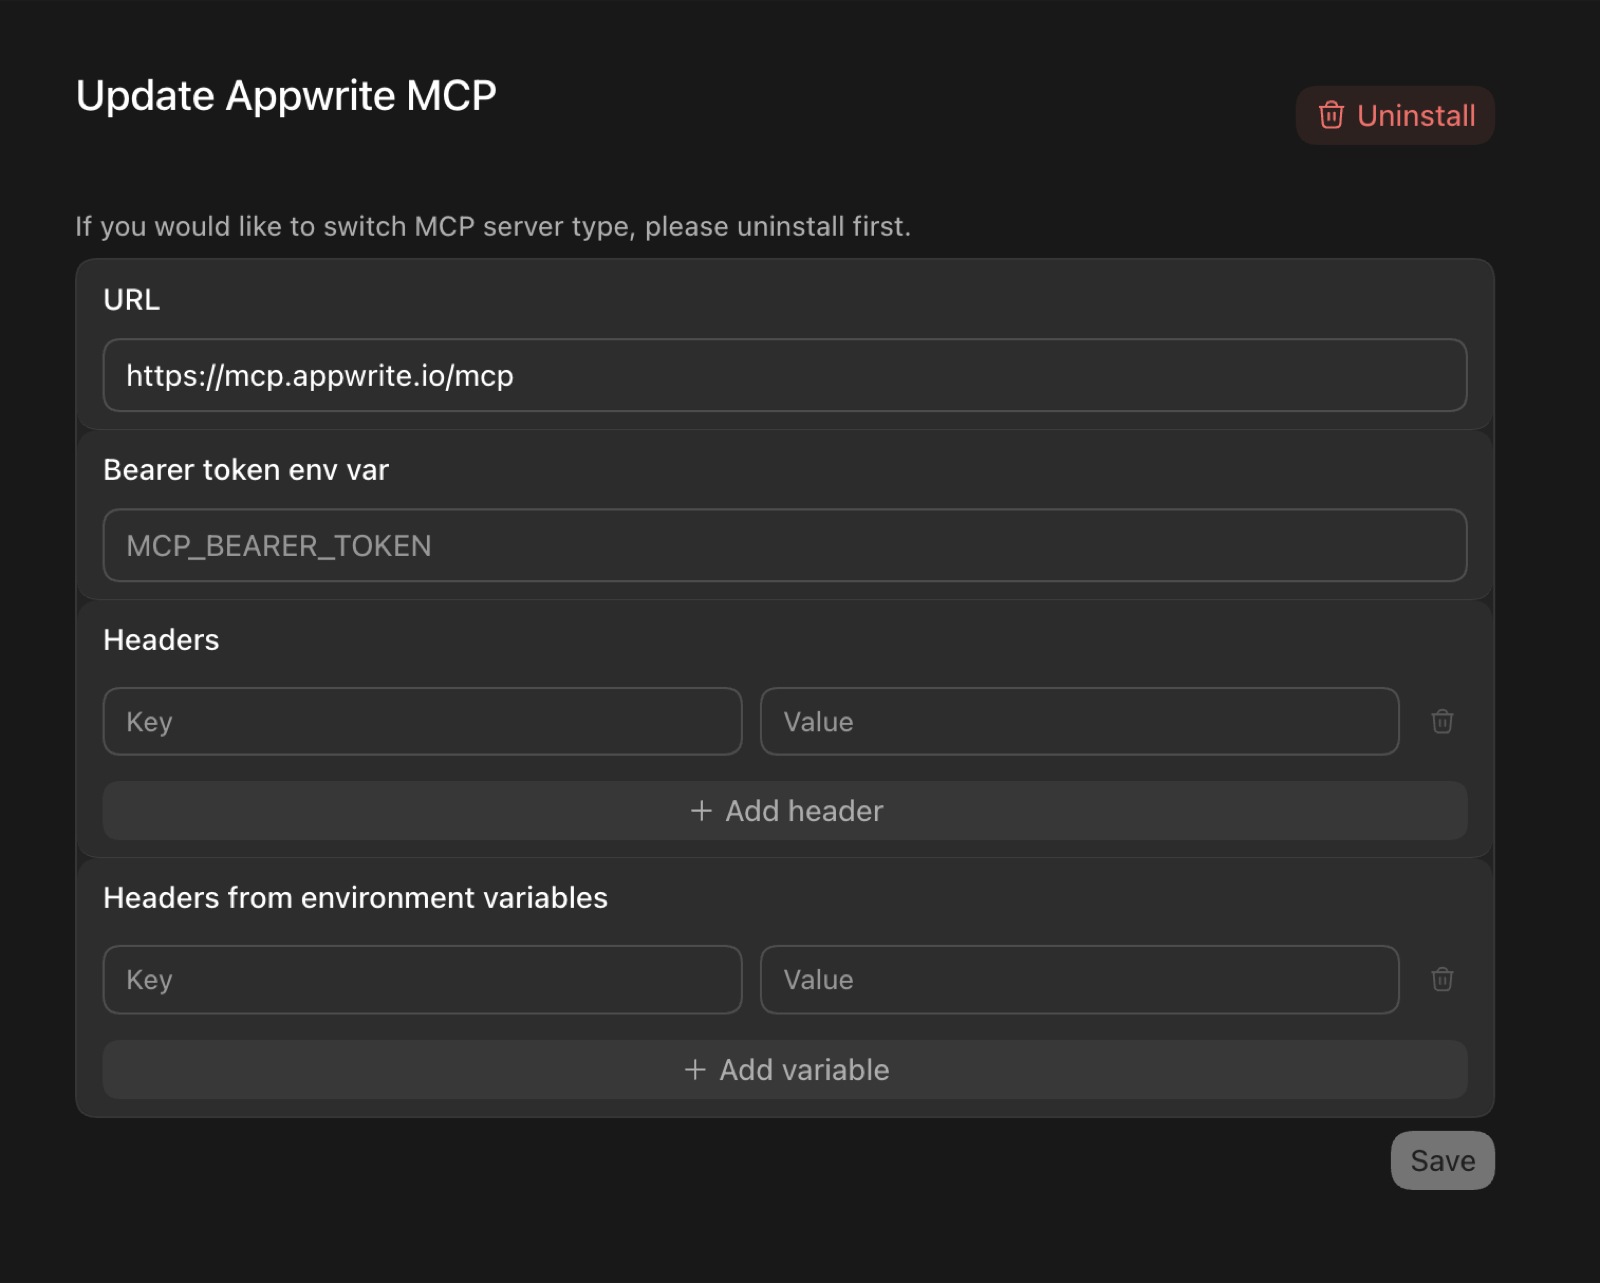
In the Codex GUI, you can instead add the server from the MCP settings —
set the URL to https://mcp.appwrite.io/ and leave the token and header
fields empty (authentication happens through the browser):
Edit opencode.json (project) or ~/.config/opencode/opencode.json (global).
{
  "$schema": "https://opencode.ai/config.json",
  "mcp": {
    "appwrite": {
      "type": "remote",
      "url": "https://mcp.appwrite.io/",
      "enabled": true
    }
  }
}
Edit ~/.codeium/windsurf/mcp_config.json.
{
  "mcpServers": {
    "appwrite": {
      "serverUrl": "https://mcp.appwrite.io/"
    }
  }
}
gemini mcp add --transport http appwrite https://mcp.appwrite.io/
Or edit ~/.gemini/settings.json (note the key is httpUrl, not url):
{
  "mcpServers": {
    "appwrite": {
      "httpUrl": "https://mcp.appwrite.io/"
    }
  }
}
Gemini CLI opens the browser OAuth flow automatically on first connect. To
re-authenticate, run /mcp auth appwrite inside a session.
Edit ~/.gemini/config/mcp_config.json (global) or .agents/mcp_config.json (project workspace).
{
  "mcpServers": {
    "appwrite": {
      "serverUrl": "https://mcp.appwrite.io/"
    }
  }
}
⚠️ Note: Antigravity strictly requires the
serverUrlkey for remote transport. Using legacy fields likeurlorhttpUrlwill cause tool registration to fail silently.
Antigravity opens the browser OAuth flow automatically on first connect. If you manually edit the JSON file, navigate to Settings → Customizations → Installed MCP Servers and click Refresh to reload the tool definitions.
</details> <details> <summary><b>GitHub Copilot CLI</b></summary>copilot mcp add --transport http appwrite https://mcp.appwrite.io/
Or run /mcp add inside a session, or edit ~/.copilot/mcp-config.json:
{
  "mcpServers": {
    "appwrite": {
      "type": "http",
      "url": "https://mcp.appwrite.io/"
    }
  }
}
A browser window opens to authenticate on first connect. Check status with
/mcp.
Go to Settings → AI → MCP Servers → Add Server → Add Remote Server, or add
to your settings.json (zed: open settings):
{
  "context_servers": {
    "appwrite": {
      "url": "https://mcp.appwrite.io/"
    }
  }
}
Zed prompts you to authenticate through the browser on first connect.
</details> <details> <summary><b>Warp</b></summary>Go to Settings → Agents → MCP servers → + Add, choose the URL-based
server type, and enter https://mcp.appwrite.io/.
Warp opens a browser window to authenticate on first connect.
</details> <details> <summary><b>JetBrains AI Assistant / Junie</b></summary>JetBrains IDEs don't yet support OAuth for remote MCP servers, so bridge through stdio (requires Node.js). Go to Settings → Tools → AI Assistant → Model Context Protocol (MCP) → Add, switch to the JSON view, and paste:
{
  "mcpServers": {
    "appwrite": {
      "command": "npx",
      "args": ["-y", "mcp-remote", "https://mcp.appwrite.io/"]
    }
  }
}
A browser window opens to authenticate on first connect.
</details> <details> <summary><b>Cline</b></summary>Cline doesn't yet support OAuth for remote MCP servers, so bridge through stdio (requires Node.js). In the Cline panel, open the MCP Servers icon → Configure tab → Configure MCP Servers, and add:
{
  "mcpServers": {
    "appwrite": {
      "command": "npx",
      "args": ["-y", "mcp-remote", "https://mcp.appwrite.io/"]
    }
  }
}
A browser window opens to authenticate on first connect.
</details>Self-hosted Appwrite
Running your own Appwrite instance? Run the MCP server locally over stdio and
authenticate with a project API key. See docs/self-hosted.md
for per-client setup.
Documentation
- Tool surface — the tools exposed to the model and the internal Appwrite catalog.
- How Cloud authentication works — the OAuth 2.1 flow.
- Documentation search — the in-process
appwrite_search_docstool and how to rebuild its index. - Self-hosted Appwrite — run the server locally with a project API key.
- Local development — running, testing, and debugging the server locally.
- AGENTS.md — full contributor guide and pre-PR checklist.
License
This MCP server is licensed under the MIT License. See the LICENSE file for details.
Related MCP servers

io.github.appwrite/mcp
Manage Appwrite projects, databases, auth, storage, functions, and messaging via AI with browser-based OAuth.

MCP Server for SWOTPal — SWOT analysis tools for AI agents (Claude, Cursor, Windsurf)
Residential proxy for AI agents via x402 — fetch, sessions, exit country
Portable AI memory shared across models and harnesses - plain markdown you own.

AI-powered dark web OSINT investigations via Tor with LLM-driven query refinement and reporting.

Niro
AI pentester for PRs — finds exploitable bugs and hands your developer agent the fix.